6 Ways to Use Natural Pigments in Your Painting

Grinding Raw Minerals
Extracting Plant Dyes
Using Charcoal and Soot
Mixing with Natural Binders
Layering with Earth Clays
Experimenting with Spices
In this post, you will learn how to integrate natural pigments into your painting practice through six distinct methods, ranging from foraging to using kitchen leftovers. Using earth-derived colors can ground your creative process, add organic texture to your art journals, and provide a tactile connection to the environment that synthetic paints cannot replicate. Whether you are looking to add subtle tonal shifts to your work or create entirely new color palettes from scratch, these techniques will help you move beyond the limitations of a standard paint set.
Natural pigments are often unpredictable, and that is exactly why they are valuable in a mixed-media practice. When we move away from the perfection of mass-produced acrylics and toward the "ugly," textured, and uneven nature of earth tones, we allow ourselves to practice vulnerability. If a pigment behaves unexpectedly, it is an invitation to adapt rather than a reason to quit. This is a form of creative self-care: learning to work with what the world provides, rather than demanding perfection.
1. Foraging for Earth Pigments
Foraging is the most direct way to connect your art to a specific sense of place. Instead of buying a pre-made "Raw Sienna" or "Yellow Ochre," you can find these colors in the ground beneath your feet. This method requires a bit of experimentation and a willingness to get your hands dirty, which is a great way to break out of a creative rut.
To begin, look for different types of clay, silt, or colored soil. In many regions, you can find distinct color variations in riverbanks or dried-up creek beds. For example, a red clay found in the American South will produce a vastly different hue than a gray silt found in a Pacific Northwest forest. Once you have collected your samples, you need to process them into a usable form.
- Drying: Spread your collected soil on a flat tray and let it dry completely in the sun or a low oven.
- Sifting: Use a fine-mesh sieve or a piece of silk fabric to strain out pebbles, roots, and organic debris. You want a powder that is as fine as possible to avoid a gritty texture in your paint.
- Grinding: Use a mortar and pestle to grind the sifted material into a fine dust. The finer the grind, the smoother your eventual paint will be.
When using these foraged pigments, remember that they are often highly absorbent. If you are mixing them with a binder like gum arabic or a clear acrylic medium, start with a very small amount of liquid to avoid a runny consistency. These pigments work beautifully as "washes" over a journal page, providing a weathered, ancient look.
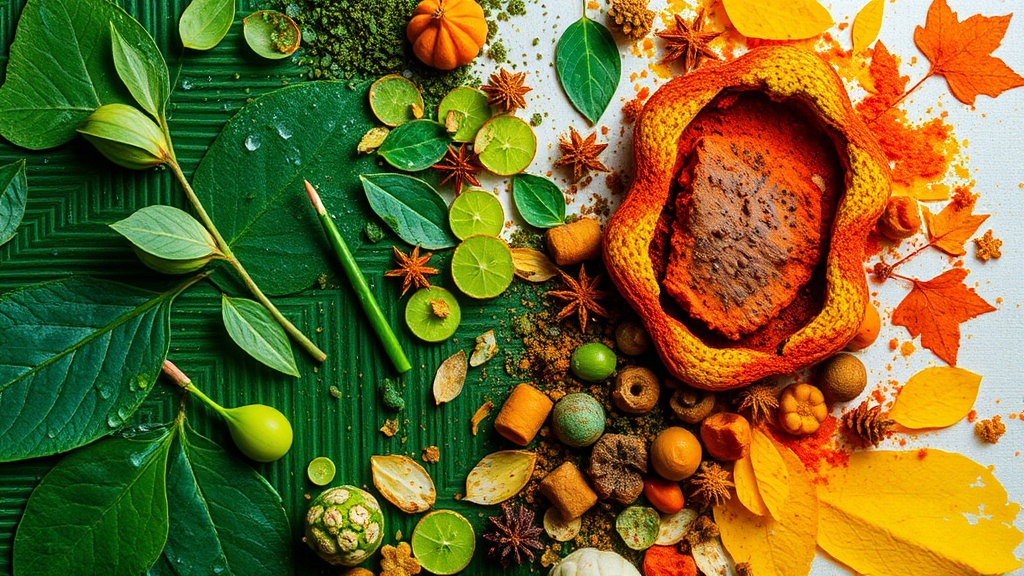
2. Extracting Color from Kitchen Scraps
You do not need to go into the woods to find color; your kitchen is a laboratory of pigment. Many common food items can be converted into highly pigmented liquids that can be used for painting, staining, or even as a base for homemade watercolors. This method is particularly effective for artists who enjoy the process of making botanical inks from kitchen scraps.
Common sources for kitchen pigments include:
- Onion Skins: Yellow onion skins produce a beautiful, warm amber, while red onion skins can yield soft purples and pinks.
- Turmeric: This spice provides an incredibly intense, vibrant yellow that can stain surfaces deeply.
- Beet Juice: Beets offer a deep, saturated magenta that is perfect for adding organic warmth to a piece.
- Coffee and Tea: These are classic staples for creating vintage, sepia-toned backgrounds. You can find more advanced techniques for working with coffee and tea stains for vintage effects in our previous tutorials.
To extract the pigment, simmer your scraps in a small amount of water for about 20-30 minutes. Strain the liquid through a coffee filter to remove all solids. To make these liquids more permanent for use in art journals, you can add a small amount of gum arabic or even a drop of liquid honey to help the pigment adhere to the paper. Be aware that many food-based pigments are light-sensitive and may fade over time if exposed to direct sunlight, so use them for journals or art that will be kept in a controlled environment.
3. Creating Watercolor Paints from Plant Material
If you want to move beyond simple stains and create actual paint that you can use with a brush, you will need to combine your plant extracts with a binder. This turns a liquid "stain" into a "paint" that has body and can be layered.
The most common binder for natural watercolor is gum arabic. To create your own, follow these steps:
- Prepare your pigment: Create a highly concentrated liquid by simmering your plant material (like berries, flower petals, or even crushed spinach) until the liquid is very dark.
- Add the binder: While the liquid is still warm, slowly whisk in a solution of gum arabic and distilled water. A common ratio is roughly one part gum arabic to two parts pigment liquid, but you should adjust this based on the viscosity you desire.
- Testing: Test a small amount on a piece of watercolor paper. If it is too thin, add more pigment; if it is too thick or "crusty," add a little more binder or water.
This method allows you to create a palette that is entirely unique to you. Using pigments derived from things like hibiscus or avocado pits can result in unexpected color shifts, which is a wonderful way to practice the art of "letting go" and accepting the results of your experimentation.
4. Using Charcoal and Soot for Value and Texture
Value is a critical component of any painting, and natural carbon-based pigments are the best way to achieve deep, velvety blacks and subtle grays. Instead of relying on a tube of "Lamp Black" or "Mars Black," you can create your own using fire and organic matter.
Charcoal can be made by burning wood (like willow or grapevine) in a controlled environment, but for an easier approach, you can use the soot from a candle or a small amount of charcoal from a fireplace. To use soot as a pigment, you can collect the fine black powder and mix it with a binder like linseed oil (for an oil-based paint) or a clear acrylic medium (for a mixed-media approach).
Charcoal is also an incredible tool for sketching and underpainting. Rather than using a graphite pencil, which can sometimes feel too precise and clinical, try using a piece of raw charcoal. It is much more forgiving and encourages a looser, more expressive hand. If you find your sketches look flat, remember that charcoal provides a depth of value that synthetic black paints often lack. You can see how to improve your depth in our post on why your graphite sketches look flat and muddy.
5. Incorporating Mineral Pigments and Crushed Stones
For artists who want more weight and physical texture in their work, mineral pigments are the way to go. This involves using actual minerals or stones that have been crushed into a fine powder. This technique is common in traditional fresco painting and can add a significant tactile element to your art journaling.
Common minerals used in art include malachite (for green), azurite (for blue), or various types of ochre and hematite. However, working with raw minerals requires caution. Always ensure you are working in a well-ventilated area and wear a mask when grinding stones to avoid inhaling fine dust.
Once you have your mineral powder, you can mix it with different mediums to achieve different effects:
- Egg Tempera: Mix your mineral powder with egg yolk and a little water. This creates a very durable, matte paint that dries quickly.
- Oil Paint: Mix the powder with linseed oil for a rich, heavy-bodied paint that is perfect for impasto techniques.
- Gesso/Acrylic Base: Mix the powder into a clear acrylic gel medium to create a textured, "crusty" surface that adds physical dimension to your journal pages.
6. Using Natural Textures as Stencils and Resist
Sometimes, the "pigment" isn't something you apply with a brush, but something you use to create a way for paint to interact with the surface. Natural elements can act as a resist or a stencil, creating beautiful, organic patterns that mimic the shapes found in nature.
Leaf Printing: Instead of painting a leaf shape, use the actual leaf. Lay a dried leaf onto your paper, and then paint over it with a thin wash of your homemade pigment. When you lift the leaf, you will have a perfect, detailed silhouette. This works exceptionally well with the botanical inks and tea stains mentioned earlier.
Botanical Resist: You can also use the "resist" method. Place items like dried herbs, small twigs, or even crushed flower petals onto your paper, then paint over them with a heavy acrylic or a thick watercolor wash. Once the paint is dry, carefully lift the botanical elements away. This leaves a ghostly, white impression of the natural object, creating a sense of depth and history in your work.
Using these natural methods is a way to practice being "imperfect." When you use a leaf or a piece of charcoal, you are relinquishing total control to the materials. This is where the most honest, vulnerable art happens—in the space between your intention and the beautiful, messy reality of the medium.