Turn Everyday Objects into Unique Texture Tools for Mixed Media

Quick Tip
Almost any textured household object can become a custom stamp or stencil when pressed into wet acrylic paint or gesso.
What household items can be used as texture tools in mixed media art?
Bubble wrap, cardboard, lace doilies, and old credit cards all make excellent texture tools for mixed media art. You don't need a dedicated studio or a Michaels shopping spree to build interesting surfaces—your kitchen drawer and recycling bin already hold everything you need.
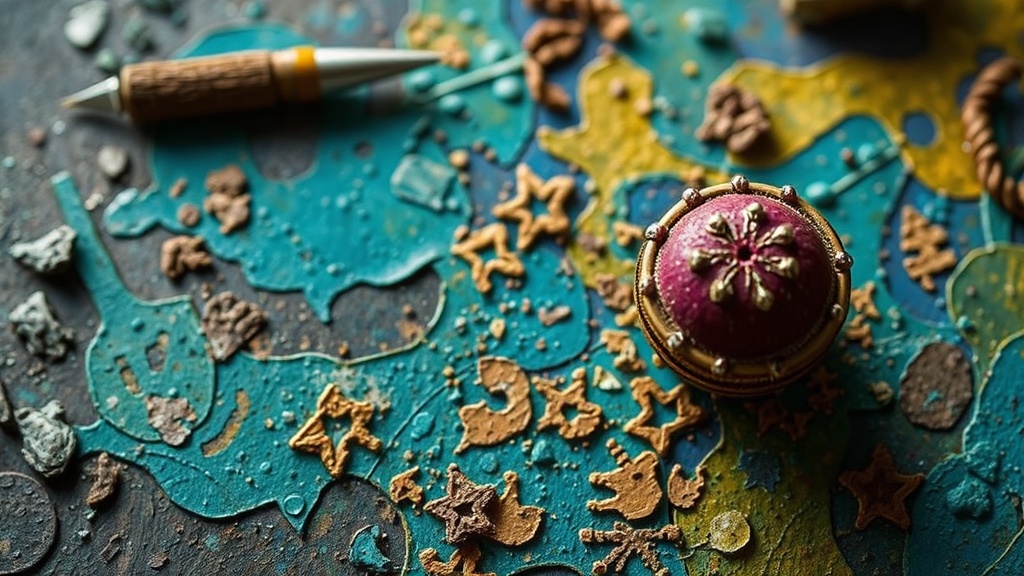
Here's the thing: texture isn't about perfection. It's about story. A piece of corrugated cardboard dragged through wet Liquitex Basics acrylic paint leaves rugged, railway-track grooves. Bubble wrap pressed into a gel medium layer creates a honeycomb pattern that catches light beautifully. Even a crumpled plastic grocery bag—yes, the one from Trader Joe's—can stamp soft, wrinkled shadows across a page when dabbed into Golden Heavy Body Acrylics.
| Found Object | Texture Effect | Best Used With |
|---|---|---|
| Bubble wrap | Uniform dots, honeycomb pattern | Acrylic paint or soft gel medium |
| Corrugated cardboard | Parallel ridges, linear grooves | Heavy body acrylics, ink |
| Lace or doily | Delicate, ornate patterns | Spray ink, thin acrylic washes |
| Old credit card | Sharp lines, scraping effects | Wet paint, modeling paste |
| String or twine | Woven, organic lines | Mod Podge, gel medium |
How do you make texture in art without buying expensive tools?
Start with what you already own—packaging materials, kitchen utensils, and discarded fabric scraps work perfectly. The goal is to experiment with pressure, layering, and paint viscosity rather than collecting pricey brushes or stamps from Dick Blick.
That said, technique matters more than the tool itself. Try these approaches:
- Stamping: Dip the object into paint and press it onto your surface. A cork from last night's wine bottle becomes a rustic dot stamp.
- Dragging: Pull a comb, fork, or cardboard edge through wet paint. The marks are immediate and unrepeatable—exactly what makes mixed media exciting.
- Stenciling: Lay a piece of mesh onion bag or lace over the page. Spray acrylic ink through it (the kind you'll find at Michaels). Lift carefully. The result is a ghostly, intricate layer.
- Embedding: Coat the object in Mod Podge or Golden Soft Gel Matte and press it into the page. You can leave it there (for a sculptural effect) or peel it off once partially dry.
Worth noting: cheaper craft paints like Daler-Rowney System3 behave differently than professional-grade paints. They're thinner, which means they level out faster—so you'll want to work quickly if you're dragging or scraping.
What techniques work best for beginners using found object textures?
Monoprinting with a Gelli Arts printing plate and found objects is the most forgiving entry point for beginners. The plate holds the paint evenly, and pressing objects into it creates crisp, transferable textures without the mess of direct application.
The catch? Beginners often press too hard—or not hard enough. Practice on deli paper (the thin, waxy sheets from the supermarket meat counter) first. It's cheap, translucent, and perfect for layering into an art journal spread later.
"Texture is the visual equivalent of a voice crack—it's the imperfection that makes the work feel human." — Art Journal community
Don't overthink the collection phase. A rusty washer, a scrap of burlap, a child's toy car wheel—each leaves a fingerprint that no manufactured stamp can replicate. (And isn't that the whole point?) Keep a "texture jar" on the desk. Toss in bottle caps, mesh fruit bags, and broken jewelry. When inspiration stalls, dump it out and play.
You've got permission to make ugly things. The page doesn't need to match your Pinterest board. It just needs to feel lived in.